Cutting flex, flock, instructions for use!

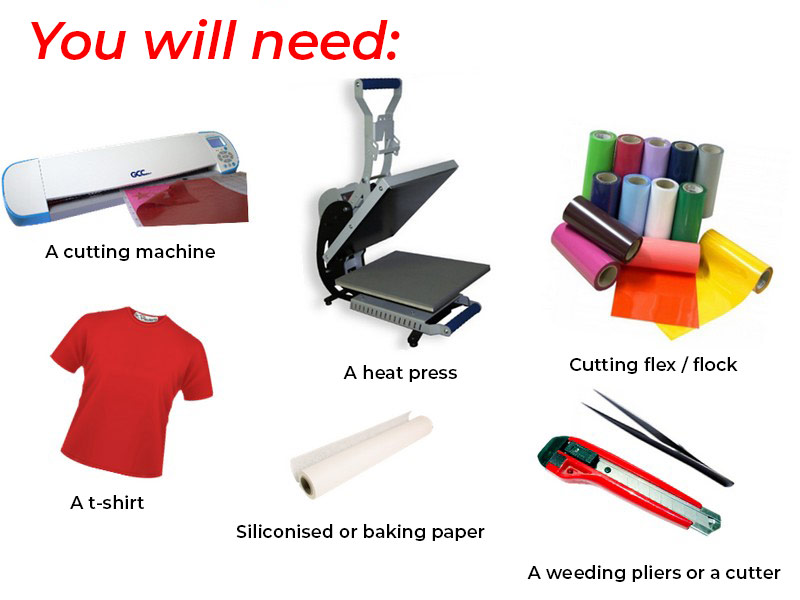
Step 1: Using drawing software, create endless files that look like you to personalize all your media. Whether you're an expert in Corel Draw, Illustrator, or new to file creation, cutting plotters come with cutting software that lets you create and launch your designs right away. You can import your own files or draw directly in the software.
Step 2: Using the cutting software supplied with the plotter and after inserting the transfer film into the machine, check that your creation is mirrored on your computer screen (negative, pattern or lettering returned). After checking, you can start cutting, the plotter will then work on its own. Whether or not you use a carrier sheet with your cutting machine, you must place the transfer film as follows: the plastic polyester facing the carrier sheet so that the plotter cuts directly into the material.
Step 3: The next step is to weed the excess material. This part consists of removing the excess part of the film which will not be present on the final marking. You can remove the material with the help of a hook, pliers or a cutter. Be careful to remove small cuts and details.
Step 4: Once part 3 is finished, the marking is ready to be placed on the textile support. All you need to do is place your visual on the fabric flat, the plastic polyester part on top. Before closing the press, it is recommended to protect the press plate as well as the marking with a sheet of silicone paper or baking paper. You can then press while respecting the temperature and time indications by referring to the product data sheets.
Step 5: Last step, once the marking is out of the press, remove the transparent polyester support hot or cold from your textile, depending on the conditions specified on the technical sheet of the product used.
IT'S OVER, YOUR TEXTILE IS 100% CUSTOMIZED!
Be sure to follow the maintenance instructions indicated on each technical sheet in order to preserve the colors and appearance of your markings.
If you want to flex in multiple colors, you can use the « puzzle » technique by cutting out each element of the creation in the desired color, or layering. In this case, you will find all the necessary information in the tutorial « Making overlays ».


100% secure
payment
Fast delivery
from 24 to 72H*
*Depending on the carrier
Customer service at
+33 9 67 04 74 21
Certifications
Oeko-Tex and EVE Vegan
