


- Description
- Application Instructions
- Avis
Transign is a high-quality calendered polymer cut vinyl film for signage and covering. It features a soft-touch surface film, a high-quality permanent adhesive, and a flat, adjusted liner for optimal working performance.
This film offers excellent cutting and easy weeding, making it perfect for applications on vehicles, windows, and outdoor surfaces that are flat or curved. The film can be applied to dry or slightly damp surfaces.
The durability of this film is 8 years outdoors.
The use of an application tape is recommended to properly transfer your designs and avoid air bubbles during installation.
Transign stands out for its special treatment with a colored liner, which greatly facilitates weeding. With a thickness of 70 microns, it provides increased robustness and durability.
Application is possible within a temperature range of 5°C to 60°C, making it suitable for various working conditions. For maintenance, it is recommended to wash by hand, which helps maintain the material's quality while making cleaning easier.
By choosing Transign, you benefit from a product that is both practical and reliable, ideal for your professional needs.
For other colors, please contact our customer service directly.
1. Cutting the Film
- Use a flex blade suitable for thin materials like vinyl.
- Adjust the blade depth according to the film thickness to avoid cutting too deeply or not cutting completely.
- Ensure the blade settings are correctly adjusted for clean and precise cuts. It is advisable to perform a test cut before starting production.
2. Weeding
- After cutting, proceed with weeding by removing the excess material around the design.
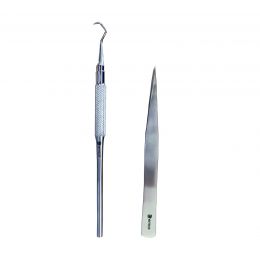
- Use weeding tools (such as a hook or tweezers) to remove the unnecessary parts of the film while being careful not to damage the important parts of the design.
- This step requires precision, especially for detailed designs or small pieces.
- 3. Transfer of the Design
- Apply transfer tape to the cut design.
- Choose a tape with suitable adhesion for the material to facilitate the transfer without leaving adhesive residue.
- Use a squeegee to firmly adhere the tape to the design and ensure it lifts completely from the backing film during the transfer.
4. Application to the Surface
- Thoroughly clean the surface where the design will be applied using an appropriate cleaning product to remove dust, grease, or other contaminants.
- Position the design with the transfer tape on the surface, checking the alignment and final position before permanently affixing it.
- Start from one end of the design and apply it gradually to avoid distortion.
- Can be applied at temperatures ranging from 5°C to 60°C, making it adaptable to various environmental conditions.
5. Removing Air Bubbles
- Use a soft plastic squeegee to apply the design to the surface, making regular strokes from the center towards the edges.
- This technique helps expel air bubbles and ensures good adhesion of the film.
- If air bubbles persist, gently pierce them with a fine needle and reapply with the squeegee to smooth the surface.
6. Removing the Transfer Tape
- Once the design is well applied, slowly remove the transfer tape by pulling it at a shallow angle (almost parallel to the surface) to avoid lifting the design.
- Check that the entire design is securely attached to the surface. If some areas come loose, use the squeegee again to reposition them correctly.
By meticulously following these steps, you will achieve a precise and durable adhesive vinyl application, free of bubbles and defects.
Couleur au top et rien a dire facile a detacher et a coller
Laetitia M. the 03/07/2026
Le vinyle se colle très bien sur de la carrosserie de véhicule même en pose mouillé. Seul bemole, la largeur du vinyle n'est pas de 30,5 cm comme indiqué sur le site mais de 30 cm. Donc j'ai du trouver un compromis pour le placer dans mon plotter.
David P. the 09/06/2026
Top qualité et facile a echeniller et poser
Charlotte B. the 30/05/2026
Belle qualité
Claire B. the 02/05/2026
Petit écart de quelques millimètres sur quelques feuilles mais, pour le prix et la qualité, c'est tout à fait acceptable 😊
Patricia D. the 01/05/2026