You may also like
- Description
- Application Instructions
- Entretien
Sparkle and style for your textiles!
Transform your textile creations into true works of art with Glitterprint, our glitter polyurethane film specially designed for heat transfer. Whether for clothing, accessories, or creative projects, Glitterprint will add a touch of shine to your light and dark textiles.
Compatible with eco-solvent and solvent ink printers, Glitterprint stands out for its ability to retain vibrant and bright colors even after pressing. Imagine your designs adorned with sparkling glitter, captivating all eyes with a luminous effect that does not go unnoticed.
Ideal for a variety of supports such as cotton, polyester, acrylic, and other similar fibers, Glitterprint offers superior print quality that will satisfy the most demanding. Easy to use, it can be transferred manually or with the tape application ATT 450, making the customization process simple and effective.
Whether for a special event, a unique gift, or simply to express your style, Glitterprint is the perfect choice to add a sparkling dimension to your creations. Let your imagination shine and express your creativity with Glitterprint!
Glitterprint is a high-performance glitter polyurethane film designed to add a shimmering touch to your light and dark textiles. With a thickness of 220 microns, this film guarantees durable and resistant application, perfect for your customization projects.
This printable flex easily applies at 180°C for 20 seconds with medium pressure, simplifying the application process without compromising quality. It retains its brilliance even after multiple washes at 40°C. To preserve the glitter's shine, reverse ironing is recommended.
The Glitterprint flex is certified EVE Vegan, ensuring that no animal-derived products are used in its manufacture.
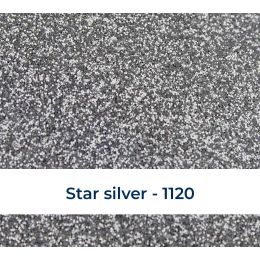
The final result of Glitterprint is glittery, adding a bright and festive dimension to your textiles. Whether for clothing, accessories, or promotional items, this film is ideal for creating designs that capture attention.
Transform your textile creations with Glitterprint and let your creativity shine!
1. Preparation for Printing the Design
- Prepare the graphic file ensuring it is set up the right way (not in mirror mode, as the final transfer will be direct).
- Configure the printer according to the specific instructions provided by the manufacturer for the type of flex or vinyl used.
2. Checking Printing and Drying Temperatures
- Ensure the printing temperature is set correctly to allow proper application of ink on the flex.
- Make sure the ink drying temperature is also set correctly. This step is crucial to fix the ink without causing smudges or print defects.
3. Using the Print Profile
- Select the appropriate print profile suited to the type of flex and inks used, for accurate color reproduction and optimized drying.
4. Drying After Printing
- Once printing is complete, carefully remove the flex from the printer.
- Allow the flex to dry at room temperature for at least 4 hours. This drying time ensures the inks set properly before handling or cutting the material.
5. Weeding
- After drying, proceed with weeding by removing the excess material around the printed design.
- Use weeding tools to precisely remove unwanted parts, especially if the design has fine details.
6. Transferring the Design with Application Tape
- With Glitterprint, using application tape is not mandatory. If needed, use a specific application tape to transfer the printed design to the textile. Avoid using paper application tape which may burn under heat.
- Position the design on the desired area of the textile, ensuring correct alignment.
7. Pressing the Marking onto the Textile
- Place the textile on the heat press, ensuring it is properly positioned and the application area is clean.
- Position the flex (with its application tape still in place) on the desired area of the textile.
- Protect the design with silicone paper to avoid direct contact between the press plate and the polyester film.
- Set the press to a temperature of 180°C, apply medium pressure, and press for 20 seconds. The combination of heat, time, and pressure ensures the design adheres well to the textile.
8. Removing the Polyester Hot
- Once pressing is complete, immediately remove the polyester backing while hot, pulling gently to ensure the marking remains securely in place.
- If you did not use application tape, the marking is ready.
By following these step-by-step instructions, you will achieve a high-quality, durable, and well-applied transfer on the textile.
- Follow the care instructions specified on the garment: Adhere to the recommendations specific to the fabric on which the film has been applied to ensure its durability.
- Wait 24 hours before the first wash: This allows the film to properly adhere to the fabric and prevents it from peeling off or deteriorating prematurely.
- Iron only on the reverse side: To protect the transfer and avoid damage from the direct heat of the iron, it is essential to iron the garment inside out.
- Storage: The film should be stored under optimal conditions, upright, away from direct light and moisture, for a maximum of one year. Improper storage can affect the film’s properties, such as adhesion or elasticity.
- Washing: The garment can be washed at a maximum temperature of 40°C. It is recommended to wash it inside out to avoid direct friction on the transfer, which could damage it.
- Do not use aggressive products: Detergents containing bleach or other harsh chemicals can deteriorate the film and affect its durability.
- Tumble drying: Tumble drying is allowed, but it is preferable to check the fabric’s compatibility with this drying method.
- Dry cleaning: Not recommended. Dry cleaning could alter the quality of the transfer.
These recommendations are essential to ensure the quality and longevity of the marking on the personalized textile.