How to create a lunch bag with HTV ?

Publié le 16 novembre 2022

You want to wow your colleagues with an original lunch bag ?
Impress them making easily your own lunch bag. Here you will find a step-by-step to know how to do it.

Material : 

• Canvas (29 cm x 80 cm) 

• 3 Heat Transfer Film : Trends Lighty feathers 1679

Quickflex revolution® 3636 et IDflex Navy blue 2412

• Design to download below PDF ou SVG 

• 1 leather or simili band of 16 cm and 1 cm wide

• 1 golden button with screwed bottom 

• 1 leather/fabric punch 

• 1 measuring tape and 1 marking chalk 

• Pins 

• 1 sewing machine 

• 1 fine tweezers or a weeding needle 

• 1 Cricut plotter or other brand 

• 1 Easy press Cricut or other brand 

•  Baking paper or siliconized paper 

• 1 towel or the special Cricut transfer mat 

• 1 iron 

Step-by-step

1. Measure and cut the 29 x 80 cm piece of fabric. Fold the fabric in half vertically to make a 29 x 40 cm rectangle. 

2. Pin and make two straight seams 1 cm on each side. 

3. Hem the top edge down 1 cm and make a zigzag seam flush with the fabric. Make a second straight seam 0.5 cm from the top edge to mark the fold. Back stitch at the beginning and end of each seam. 

4. Fold the bag in half, seam to seam to match the corners. Draw a 14 cm straight line at the bottom of each corner. See explanatory photo. 

5.  Make a straight seam on each marking. Cut the corner 1 cm from the seam. Turn the bag inside out and shape it into a lunch bag so that it stands on its own.  

6. Iron the bag and set aside. 

7. Launch the plotter software and import the file. You must have 3 working layers, one per color or pattern. 

8. Prepare the cutting mat by placing the glossy flex sheet (with polyester) against the mat. Load the mat. 

9.  On the plotter software, select the format of your cutting mat, check the mirror mode, very important, then the type of material to be cut, here flex iron-on. 

design space cricut

10.  Start the cutting and repeat the operation for the 3 flex sheets: Trends / Quickflex Revolution® or ID Flex. 

plotter flex DIY lunch bag
écheniller flex DIY lunch box

11. Using pliers or a weeding hook, remove the excess material to reveal the shapes of the design. 

12. Install the terry towel or transfer mat and place the ironed bag on top. 

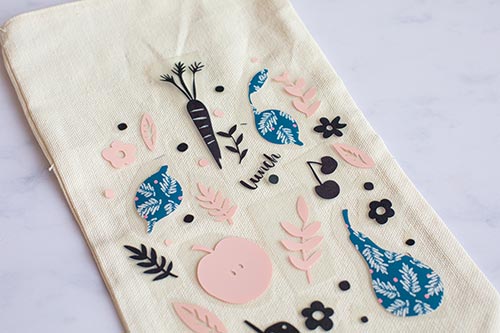
13. Place all the shapes of the pattern with a clip to reconstitute the visual. Be careful, the shiny side with polyester must be facing you. 

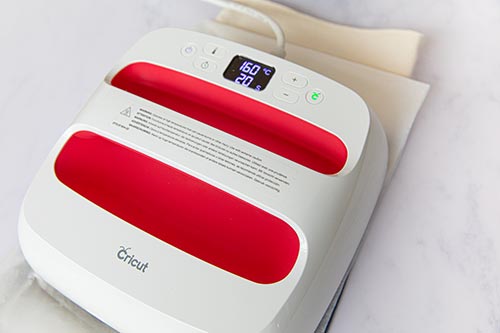
14. Install the heat press and set it to 160°C and 20 seconds. 

15.  Place a sheet of baking paper or siliconized paper on the pattern and place the press on top. Start the timer and apply pressure with your hands on the machine. 

16. Once the timer is finished, remove the protective sheet and wait for the surface to cool completely. 

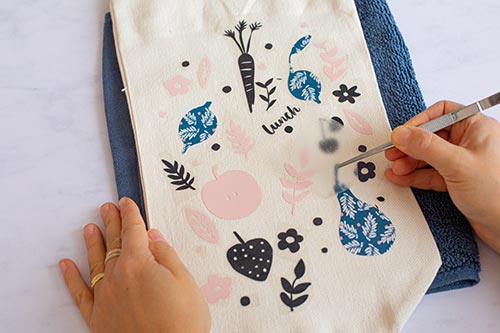
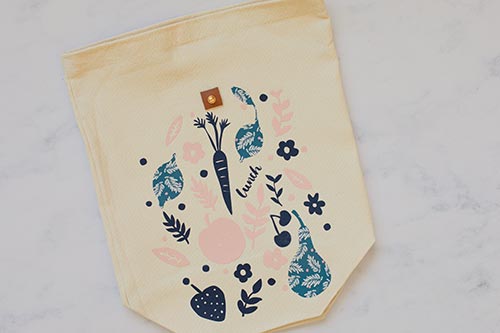
17.  When the fabric is cold, gently remove the polyester film from the transfer to get the final material. 

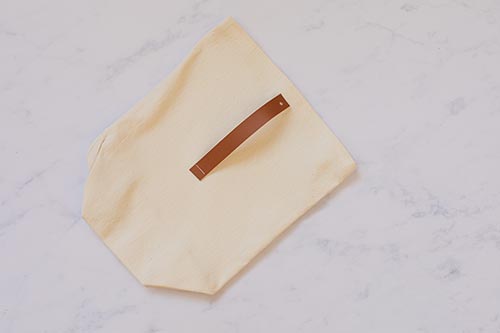
18. To finish, add the leather strip and the button closure. Cut a strip of leather 16 cm long and 1 cm wide. And a small square of leather of 1 x 1 cm. 

19. Using the punch, make a hole 8 cm from the top and in the center of the bag. Punch the leather square in the center of the bag and attach it to the bag with the screwed button. 

20. Then sew the leather strip to the back at 17 cm from the top and center of the bag. Make a straight seam 1 cm from the edge of the strip. Go back and forth several times to make sure the seam is solid. Punch a hole 1 cm from the end of the strip. You can now roll the top of the lunch bag down and close it by hooking the other side of the leather over the button closure. 

Video - How to create a lunch bag with HTV ? Transfer-ID

Free design to download here !

Leave a comment
Security code
Related posts

100% secure
payment

Fast delivery
from 24 to 72H*
*Depending on the carrier

Customer service at
+33 9 67 04 74 21

Certifications
Oeko-Tex and EVE Vegan